
HOW TO CREATE AN iOS 14 THEME ?
Here is everything you need to know to create a beautiful iOS 14 theme for your iphone / ipad
Step 1. Clear your apps !
With the new feature you now have a default app library on the extreme right slide of your phone. You can now hide some pages containing most the apps your don’t use.
- You want to make a list of the apps you are going to use regularly and that are worth of showing in your new aesthetic. The others we will keep hidden in the library.
- Once you are done with your list hold your finger on the screen,
- Select the little bubbles at the bottom which are showing how many pages you have.
- Deselect the pages containing all your apps
- This will allow you to quickly hide everything and start fresh.

Step 2. Download your resources.
From your download link you want to access your resources to create a nice theme.
- Download the ICONS + QUOTES sheet and save it to your files
- Download the BACKGROUNDS + WIDGET sheet, save it to your files as well.
You could directly download the icons and images from there, however saving them to your files guaranties a smooth download.


Step 3. Creating the icons
This is the core of the process to change the aesthetic of your icons.
- Open the ICONS + QUOTES sheet and follow the link to dropbox. Make sure you get the app as the downloads through the online platform is less easy.
- Select the top ticking box at the top and choose the apps from your list that you are going to create. (If you have 2 options of colours I would advise to get the 2 now per each app to have more flexibility with your creations)
- Choose the Export button at the bottom and save them to your camera roll

- Open the Shortcut app in your phone (it’s a default Apple app)
- Choose to go in All shortcuts
- Tap on the + button in the top right corner
- Choose add an action and in the search bar tap « open app »
- Then tap on « choose » to select the app you want to create and select it from the list

- Select « Next » at the top right corner and Rename it after its name to find it easily.
Your shortcut is now created from now on it mostly fun :
- Tap on the 3 little dots on your Shortcut
- Tap on the 3 little dots again in the top right corner
- Choose add to home screen
- In the lower part tap on the image to change it for the icon of your choice press add and done.
- Your first icon is now in your screen !

You can repeat these steps for the other apps from your list and have fun creating with one color, or multiple one.
Regarding the apps at the bottom of your phone you will need to « delete » them and then choose to keep them in library to make some space and add your new icons.
Step 4. Create your Widgets
Now that you have all your pretty icons you want to add the inspiration on your phone ! Some nice images, some interactive calendar, some quotes etc…
- Let’s download all the resources you want from your deliverance sheets. In ICONS + QUOTES select the « QUOTES » button and like we did for the Icons export the ones you would like to display in your library by saving them

- Download from BACKGROUNDS + WIDGETS the backgrounds you want to have for your phone and don’t forget to do the same for your future widgets, download the images you want to display on your phone and save everything in your library.
- To avoid having to dig in your downloads simply tap on the top arrow of the downloads and tap on the image to save it directly to your camera roll.

Change your backgrounds to get the vibe on your phone already
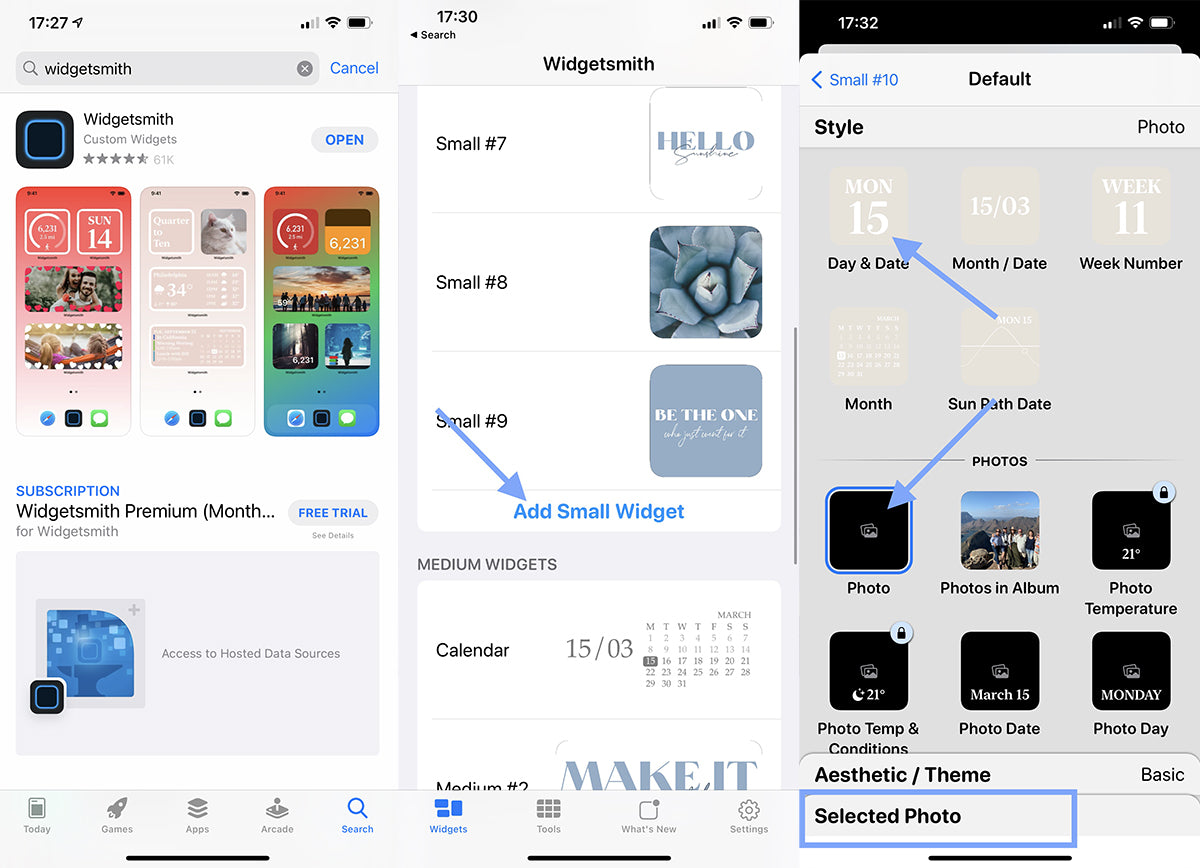
- Download the Widgetsmith app in the app store
- Open it and create your widgets you have the options between 3 sizes small / medium / large.
- Open the default widget and change it for what you want to add : calendar, image etc…
- Create as many widgets as you want in the app by clicking « add widget » in the category of size you want to have.
- Create a timed widget by adding multiple photos / quotes and place them on a certain time schedule : this will rotate the images on your displayed widget depending on the time it is.
Step 5. Place your widgets on your screen
- Hold your finger on your screen until the apps starts to wiggle and select the top left corner « + » button
- Scroll until the very bottom and choose the Widgetsmith app in the list
- Choose the size of widget you want to place on your screen
- Repeat this process to add more.
- To change the content of the widgets hold your finger on one you want to change and select « Edit widget » , tap on the « # number » displayed and choose another number in the list. They correspond to the ones you previously created in the app.
- To access the app easily operate a single tap on one of your widgets and access the whole list to change them or create new ones.

This is the creative part of the customisation of your phone ! There is no limit.
Well done your are done creating a beautiful Aesthetic for your phone !
Additional informations :
- If you made a mistake using the wrong logo for your app or if you want to change the colours, delete the icon you created (remember this is just a shortcut not the actual app ) and start over changing the cover from the shortcut app. You basically go back on the second part of step 3 by clicking on the 3 little dots. This is the process you will do to change the aesthetic if you want to change color.
- Don’t forget to turn on your notifications they won’t appear on your icons anymore so make sure to set everything up to not miss messages, calls, email etc…