
HOW TO INSTALL PRESETS IN PHOTOSHOP
I created this guide to ensure you can easily install our presets smoothly without surprises, if you haven’t got the chance to get your pack yet you can always get your Lightroom mobile presets here.
INSTALLING LIGHTROOM PRESETS IN PHOTOSHOP
Using Photoshop has the advantage to be able to do all the editing processes you want without having to go back and forth with other editing softwares.
We created our presets to simplify your editing and save you time is the process.
Getting Lightroom presets inside photoshop is not an obvious process let me show you how you do it !
STEP 1. GET THE SOFTWARE ON YOUR DESKTOP DEVICE.
Download Photoshop CC from your creative cloud and open it.
STEP 2. OPEN AN IMAGE
To make sure you can access the next step you need to be on an open image, so select any, preferably one that you wish to edit straight away to see the immediate result on your photo
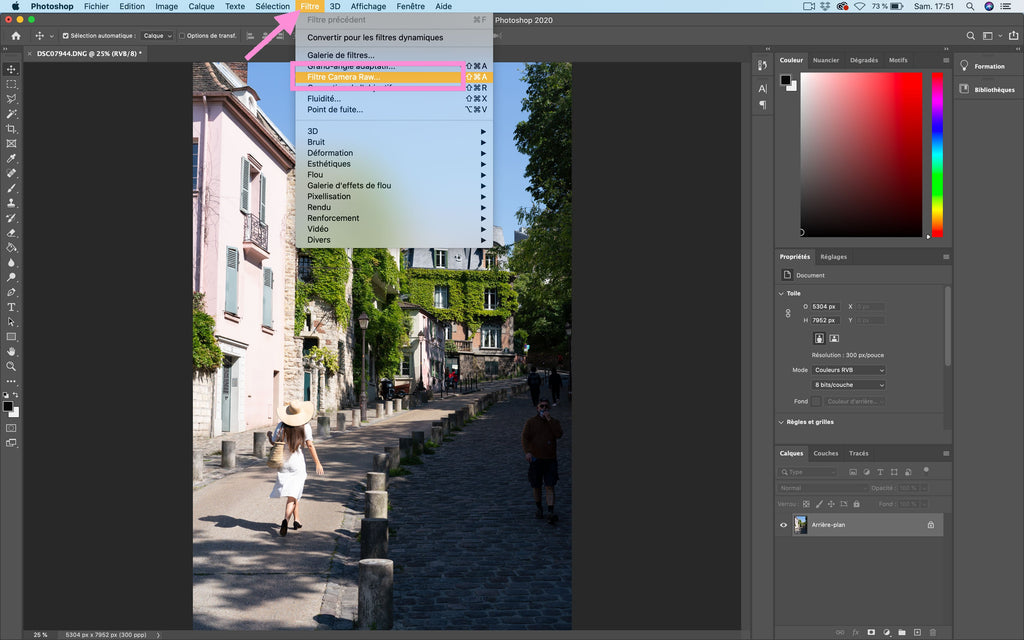
STEP 3. OPEN CAMERA RAW
Camera Raw is the interface where you do the basic color editing of your photo in Photoshop, you need to open it to install or use presets- In the top menu select "Filter"
- Choose the option "Camera Raw filter" in the dropdown
- Camera Raw opens
STEP 4. IMPORT YOUR PRESETS
- Open the preset tool tab in the tools menu
- Right click on any existing preset group, it can be a group which synchronized automatically or the default adobe presets.
- Choose the option to "Import profiles and presets" in the dropdown
- Import a ZIP file containing your presets for desktop (".xmp" or "lrtemplate" format compressed into a zip file)
- Click on import and you will now find your presets in the list


YOUR PRESETS ARE NOT APPEARING ?
- Do a right click on any preset group you have in the column
- Enable the option to "Show partially compatible profiles and presets"
- Your pack will now show up in the list
